Overlap is quite a common principle that brings a nice organic feeling to the movement! It is particularly efficient when dealing with extremal limbs such as arms, tails or animals’ ears… With no more talking, let’s get started!
A first basic example!
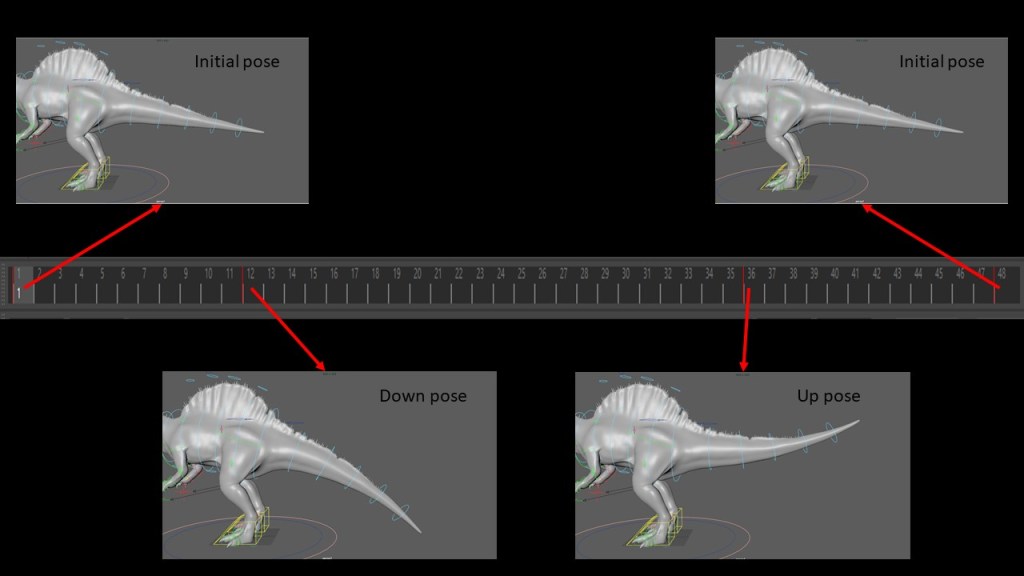
As I said earlier, overlaps is especially efficient when working with tails, so imagine I have a dino and I want to move his tail up and down (cf. images below). In order to do so, I will create 4 keyframes, one for the initial pose, one for the pose where the tail is down, one for when it is up and finally one for going back to the initial pose.
The result is OK but not really convincing, the tail of our dino seems a little bit stiff and the movement is somehow robotic. Let’s take a look at the graph editor to see what’s happening.
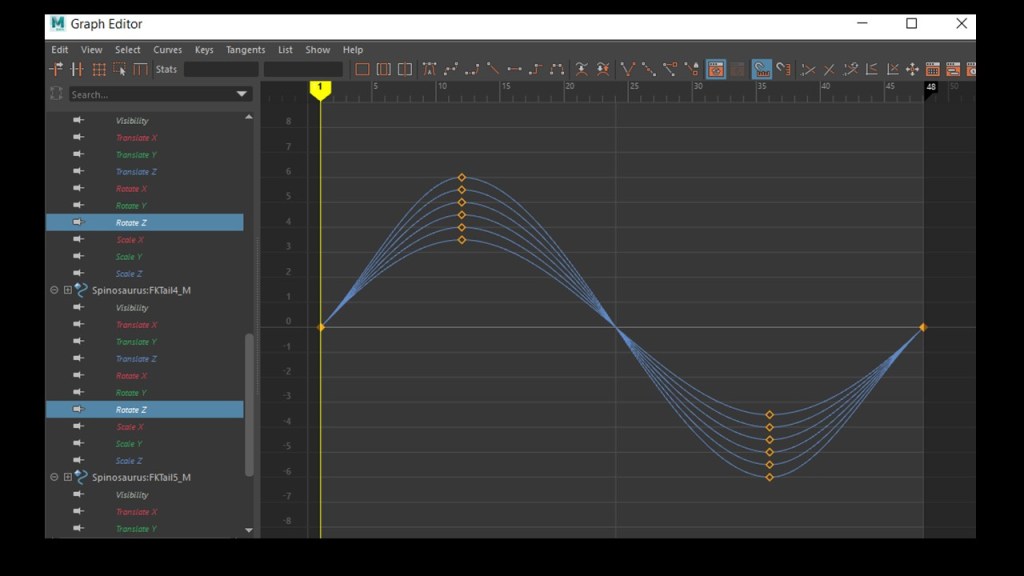
That synchronization may be a problem (I will give an intuition of why is that in the last paragraph!). Let’s just desynchronize by offsetting all the rotations by 2 frames from each other: we obtain the graph below as result

We can even push by taking an offset bigger, like 4 frames! Let’s take a look at the result:
Without effort we have a result that is already way less robotic and seems more flexible! Of course, there are other things to improve that movement (working on the amplitude and the timing to lose that “too symmetric” feeling that we have for example) but that’s not the point of this talk 😉
Just playing with the moment the rotations (or the movements of the joints) are engaged can remove the feeling of stiffness that we have if everything move at the same time.
Let’s have another example
Though the trick worked here, I don’t want you to think that the only way of doing overlap is by creating your poses then offsetting everything afterwards. To be honest, it’s not really a good practice (but it works so use it when you can!) as it creates a lot of keyframes everywhere -and not the same for every controller- so that can create quite a mess.
In animation, it is always better to ‘know what you’re doing’. Rather than recklessly moving our frames afterwards, it is way better to use the breakdowns to prepare our movement so that the overlaps are controlled! Let’s take the punch animation from this video.


In the end, it is somehow the same process than in the previous section, except that in this case, we used our brain and had more control over what we were doing!
Why is it so important to engage the joints at different timing??
My explanation is not totally accurate as there are multiple categories, but gives a nice intuition about what is happening. As we saw earlier, giving engaging all joints at the same time results in a robotic/stiff/rigid motion.
In physics, we call ‘rigid bodies’ solids that cannot be deformed. What does it mean for these rigid bodies? A particularity they have is that every particles they contain somehow move all the same way (to be precise they keep the same relative distance with regards to each other). If it only translates, all the particles will have the same speed; if it only rotates, they will all have the same angular velocity.
But most of the things we are considering in the real world are not rigid bodies. For example, that’s why, when you animate the flesh (during polishing step), you will probably make it wiggle with a short delay compared to the primary animation.
Furthermore, when you lift naturally your arm, you will mostly put your energy for lifting your upper arm, then, the speed your forearm will get from the beginning of the movement will make it easier to lift it afterwards! Engaging everything at the same time (except in some cases of course) is not natural because it’s not efficient at all!
If there is something to remember from this post, it is to deeply think about your movement before animating it! If you understand how your character handles its energy and how they uses their limbs, you will engage the movements of the different joints at the right timing and get natural overlaps!
Cheers,
Nico
