In this article, I will briefly talk about the basics of Character Animation in Computer animation so that we can quickly get an idea of how animators work inside their animation software! This talk is slightly more technical than the one about animation but nothing really crazy. It’s not totally exact either, but it is simplified so that it is easy to understand.
What is the equivalent of drawing in 3D?
If you already read the article about the basics of animation, you would know that we need to first craft ‘keyframes’ and ‘breakdowns’. In 2D that’s pretty obvious, we need to draw, or on a piece of paper that we will scan, or directly on softwares like Photoshop. In CG (Computer Graphics), it’s a little bit more complicated.
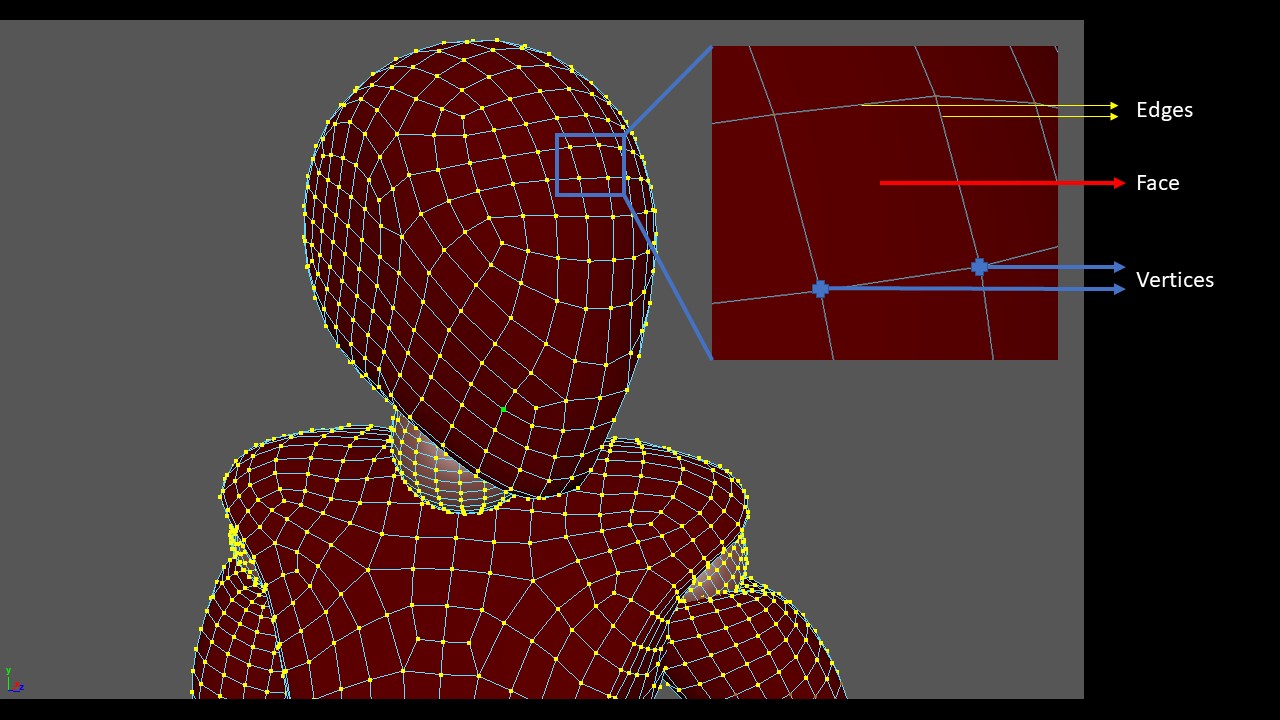
First, we need to create a 3D Model of our character (that’s a step called ‘Modeling‘). In CG, 3D models are just a huge piece of geometry composed of ‘meshes’, indeed, if you look very closely your 3D models, it’s not totally smooth but rather a concatenation of small polygons*.
(*) There is a ‘smooth’ way to represent 3D shapes called ‘implicit surfaces’ but that’s somehow complicated -basically, we represent the shape as the solution of a given equation- and a whole topic of research so let’s not talk about that here 😉
So how do we make it move?
Do we need to move all the vertices one by one to shape our poses then? That would be really really painful and not such a good idea. Instead, we create a skeleton that we link to our 3D model. Moving the skeleton will move the geometry accordingly so we do not have to care about the mesh anymore and can rather focus on the bones.
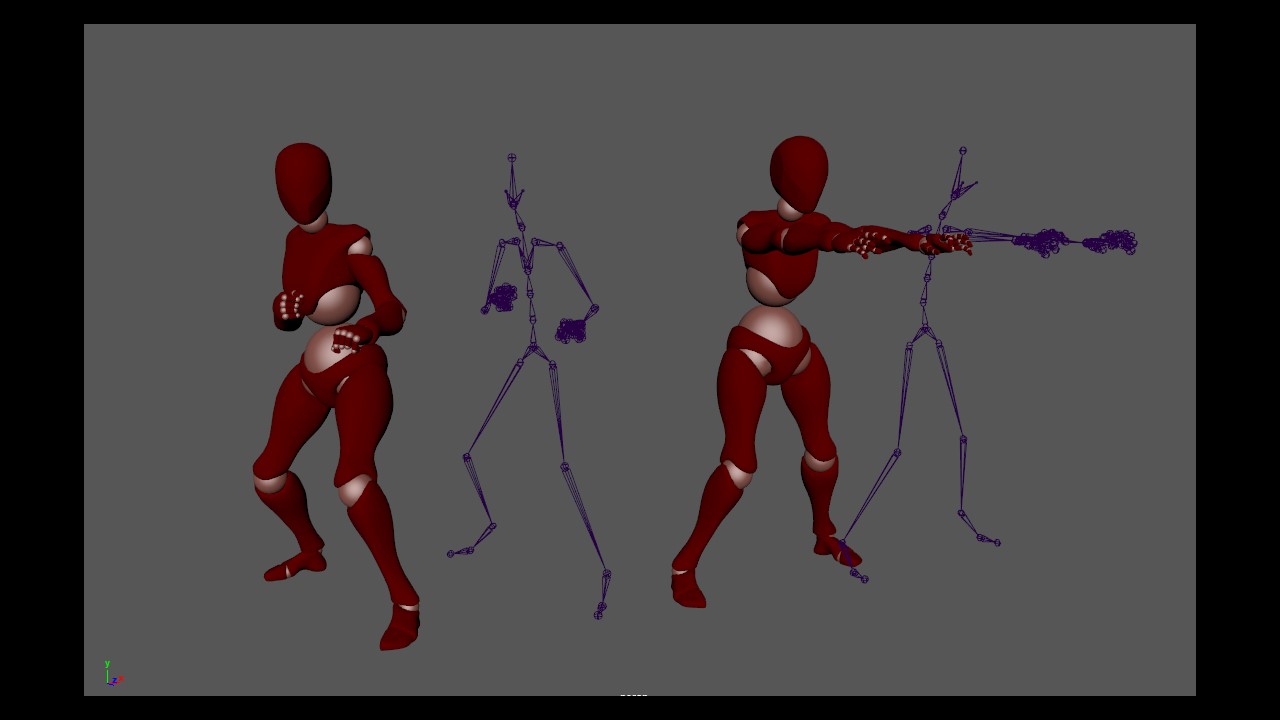
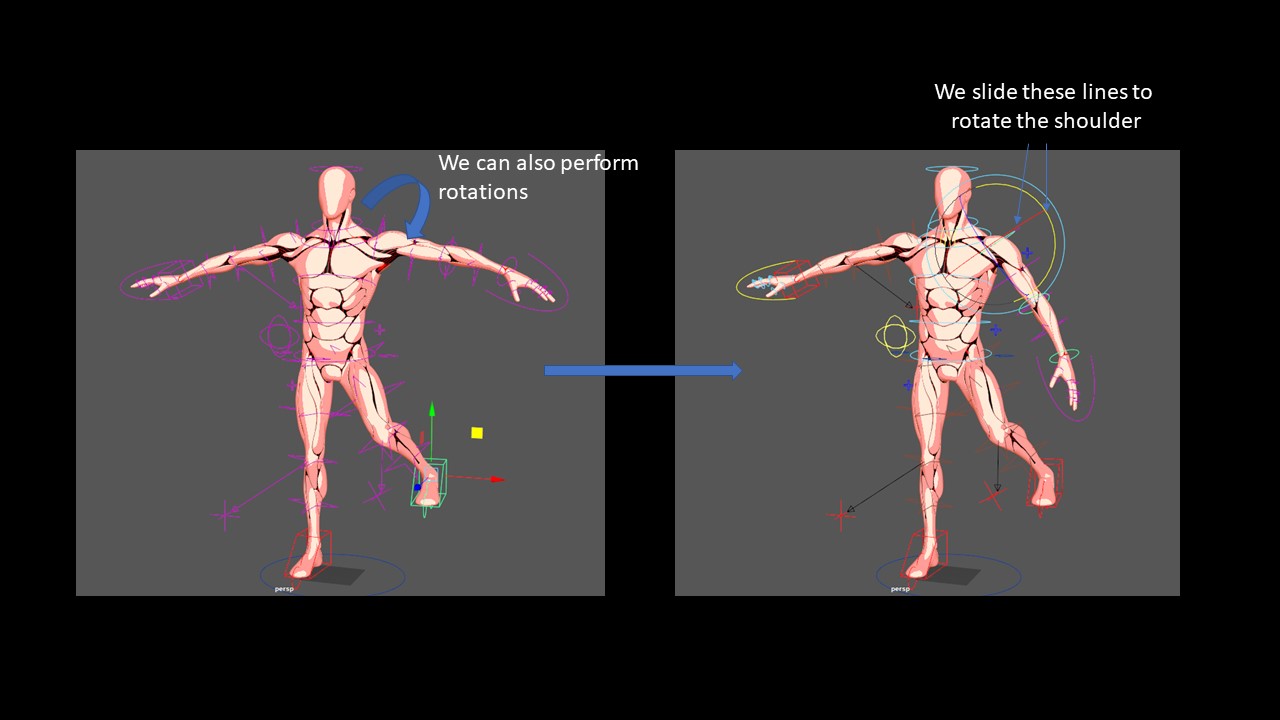
In practice, most of the time, we do not even touch the bones directly, we prefer creating manipulators that will control the bones: we obtain some sort of puppet that we can manipulate easily and then shape our pose comfortably.
We call this puppet a ‘rig’ and the process of creating such a rig from a 3D model is called ‘rigging’ (it involves an extra step called ‘skinning’: we need to make sure that the geometry of the 3D model deforms correctly when manipulating it)
A few (not so) technical details
Let me clarify what I said earlier. When we modify the controllers, to be more precise we modify its ‘attributes’. For example, the most common attributes are the values of the ‘Translation’ and the ‘Rotation’ which indicate how much the controller is tranlated/rotated from its initial position.
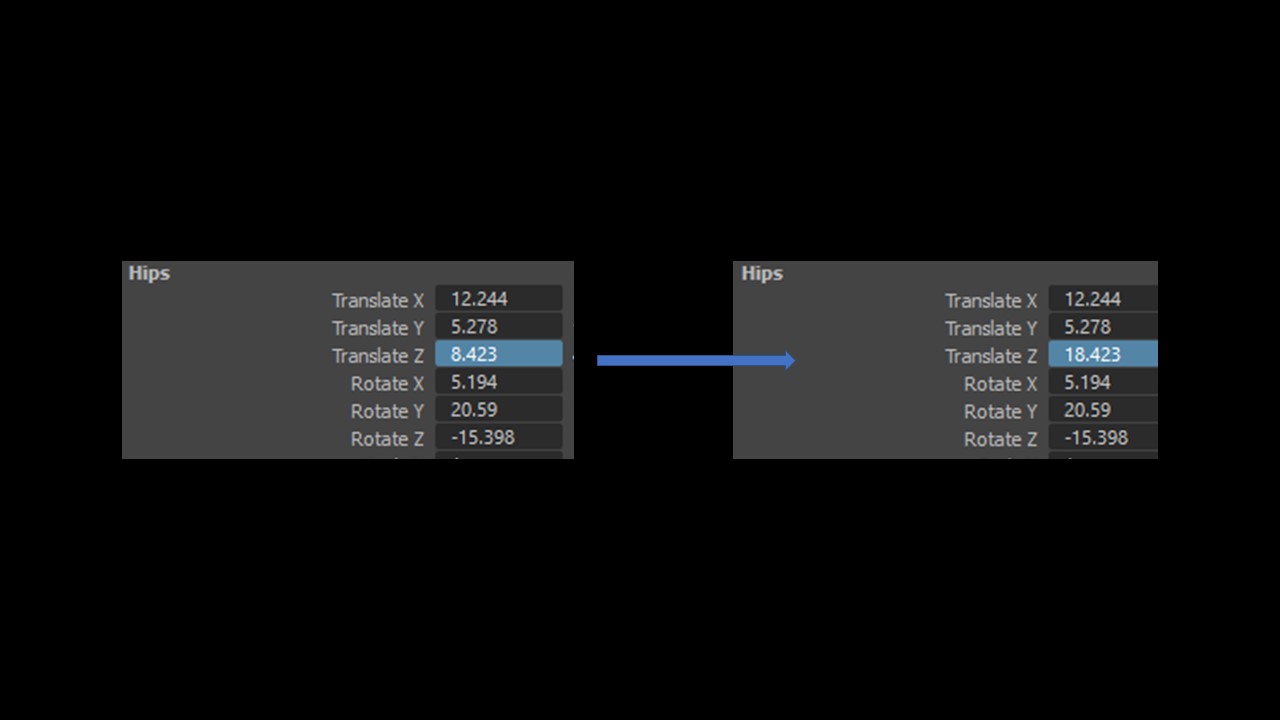
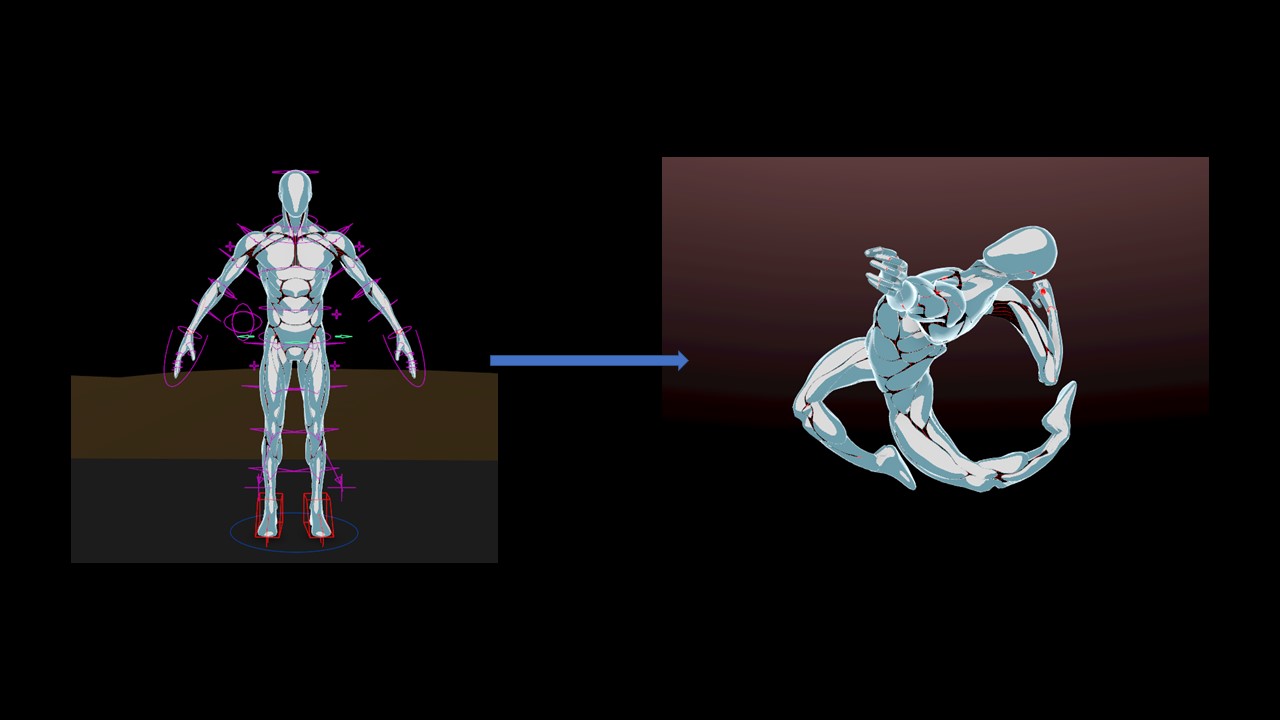
To summarize, when we manipulate the rig, we change the value of some of its attributes. From the values of the attributes, the rig can calculate how the geometry of the 3D model will be. (When you think about it, if the rig is really complicated, it will not be possible to calculate fast enough to achieve real time manipulation. That’s why some rigs have some latency when manipulating them)

And what about the interpolation?
When you think in terms of attributes, the interpolation is really straightforward, you just have to move slowly your attribute to its value from one pose to the values of the other poses.
To make it clearer, let me give you a concrete example. Let’s say I have a cube that moves only on the Z axis (from left to right or right to left only. It cannot up/down forward/backward). Consequently, it has just one attribute: its Translate Z. I want it to be at Z=0 on frame 1 and Z=10 at frame 50.
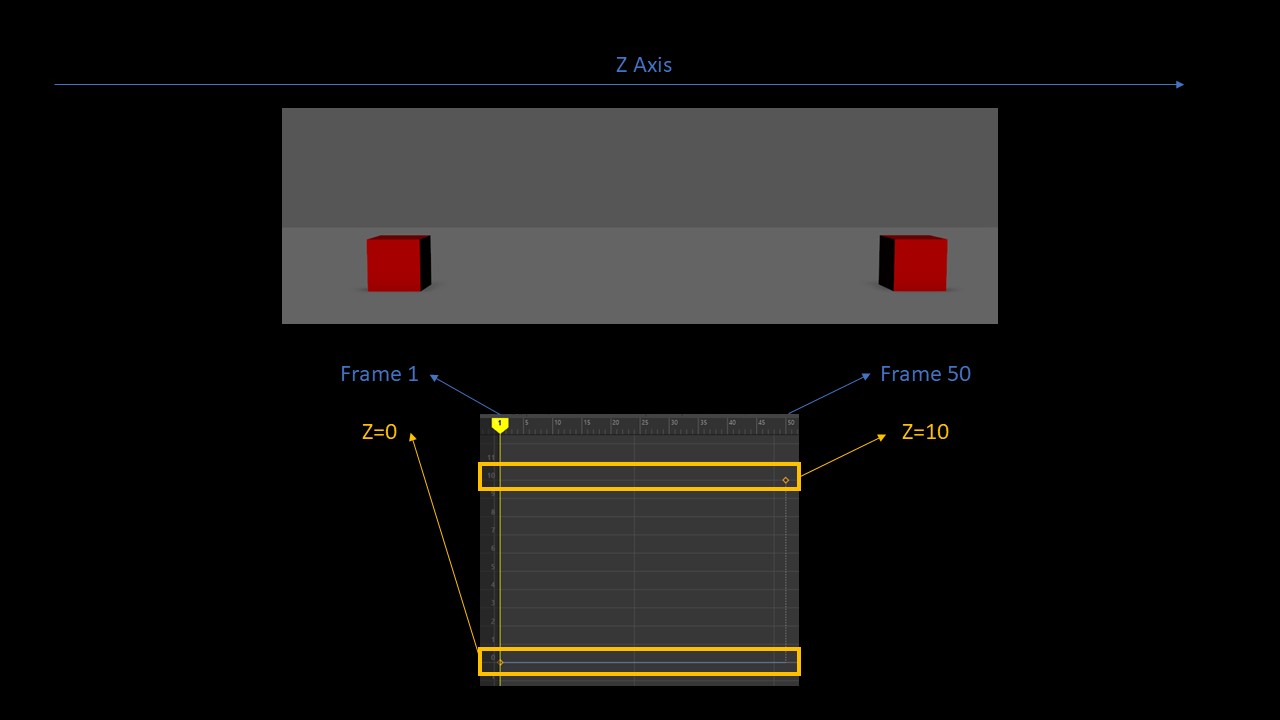
Now, you must see what I mean, rather than brutally switching the value, why don’t we make it change over time? In mathematics it is called ‘interpolation‘: we find a smooth transition to go from one value to the other. The value of Z over time is an object that we call ‘animation curve‘. To interpolate (create the inbetweens) the movement of our rig, we just have to interpolate the animation curves of each of its attributes!

Conclusion
I tried to cover the very basics in this article. To sum up:
- We create a 3D model which is a chunk of polygons
- We create a ‘RIG‘ which lets us manipulate the 3D Model as a puppet
- When we manipulate the rig, in reality, we are updating the attributes of the rig. The rig uses these attributes to calculate the pose
- To interpolate between the poses, we just interpolate the animation curves i.e the values of the attributes over time
I will tackle more notions about manipulation (IK/FK manipulation, blendshapes etc.) in further articles. If this one was not clear already, please contact me, I will do my best to improve this article!
Cheers,
Nico
